
Posted on July 21, 2023
Cambridge Z88 RAM and ROM upgrade
I got my Cambridge Z88 from eBay in July 2020. I never had a serial cable for it or any extra software, so it didn’t see a great deal of use. I had planned to investigate what I could get running on it, but never actually did much. Until now…

I recently discovered that there are still developments happening with OZ, the operating system used by the Z88 on a Jira site – Welcome – Cambridge Z88 (jira.com). This got me intrigued and curious how I could get an updated OZ running on my own unit.
There were two options, one was to get a Rakewell Flash or Flash/RAM card and the other was to upgrade the internal RAM and ROM. As you can guess from the title, I chose the latter.
When using a card to load the new OZ, the system can simply be rolled back to the old OZ version by resetting it without the card inserted. Which is nice if you don’t want to modify the system at all. You can also use a card alongside the internal upgrades for even more RAM and or storage, but I’m not sure I’ll need that for my experiments with the system (at least not yet!) so I decided to hold off for now. I got a good deal on a tested RAM chip and pre-programmed ROM chip with OZ 4.7 from a seller on eBay which saved me having to track down and program my own.
Older guides for the upgrade suggest cutting tracks to get the replacement chips wired up correctly as they aren’t an exact match for the pinout of the originals. I however found a guide on the Z88 section of the Sinclair ZX World forums for both the RAM and ROM upgrades which show how to avoid any permanent modification to the board with some pin lifting and clever wire routing though spare holes in the PCB. I’ll not go into too much detail here since the guides explain everything rather nicely.
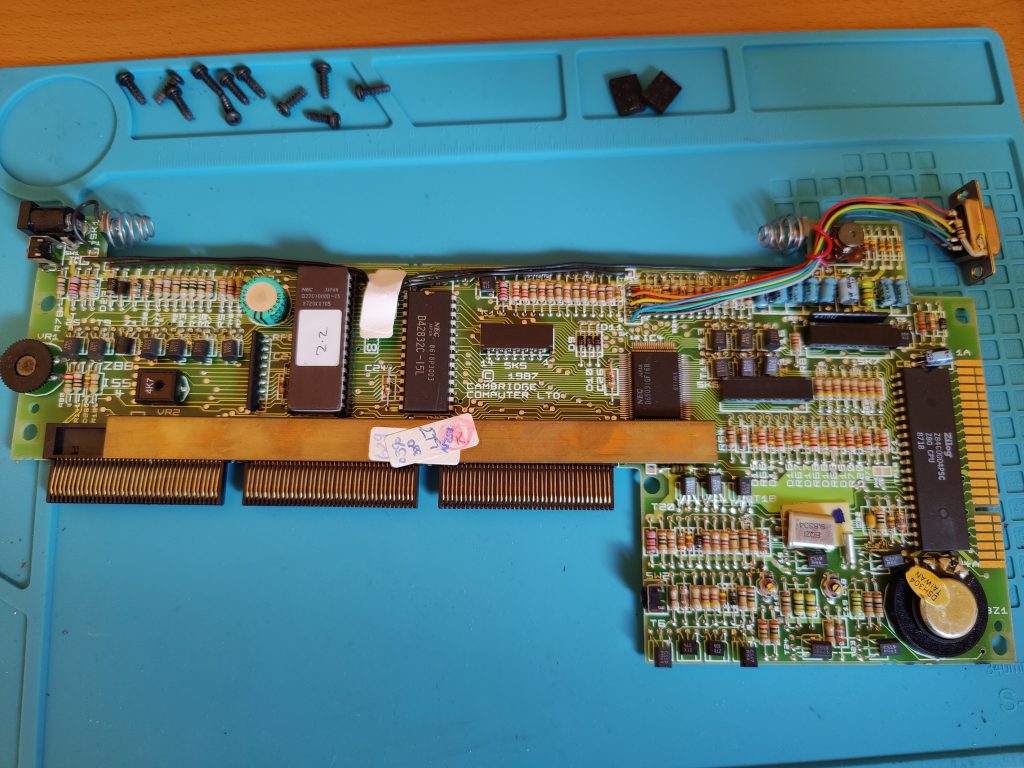
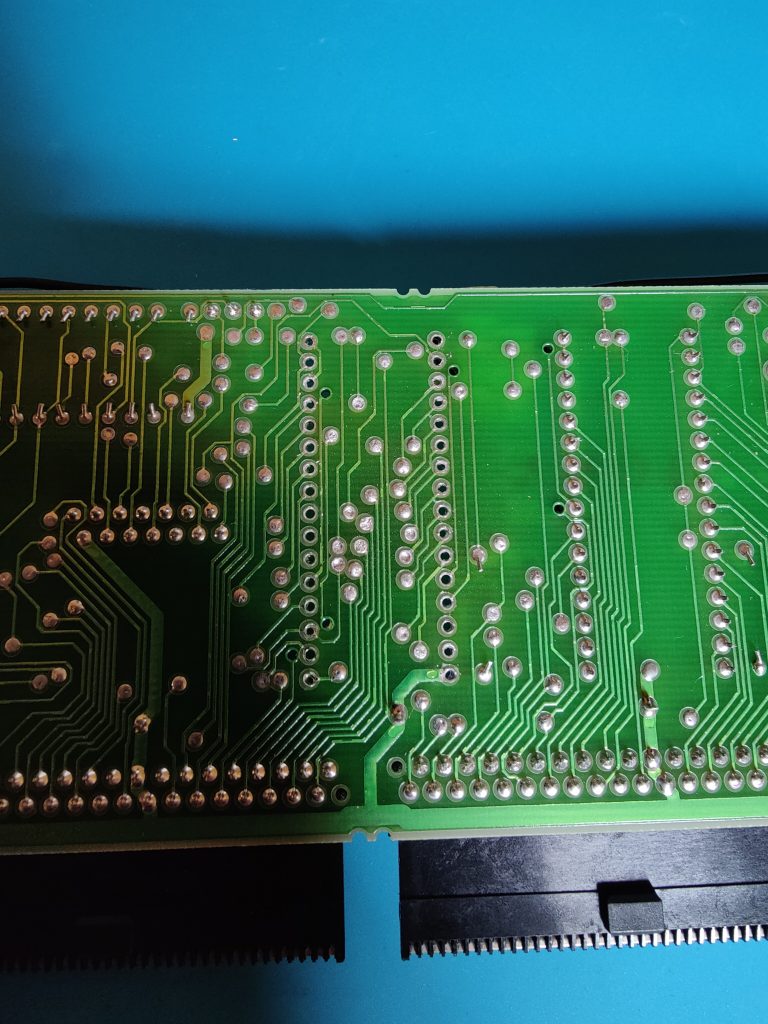
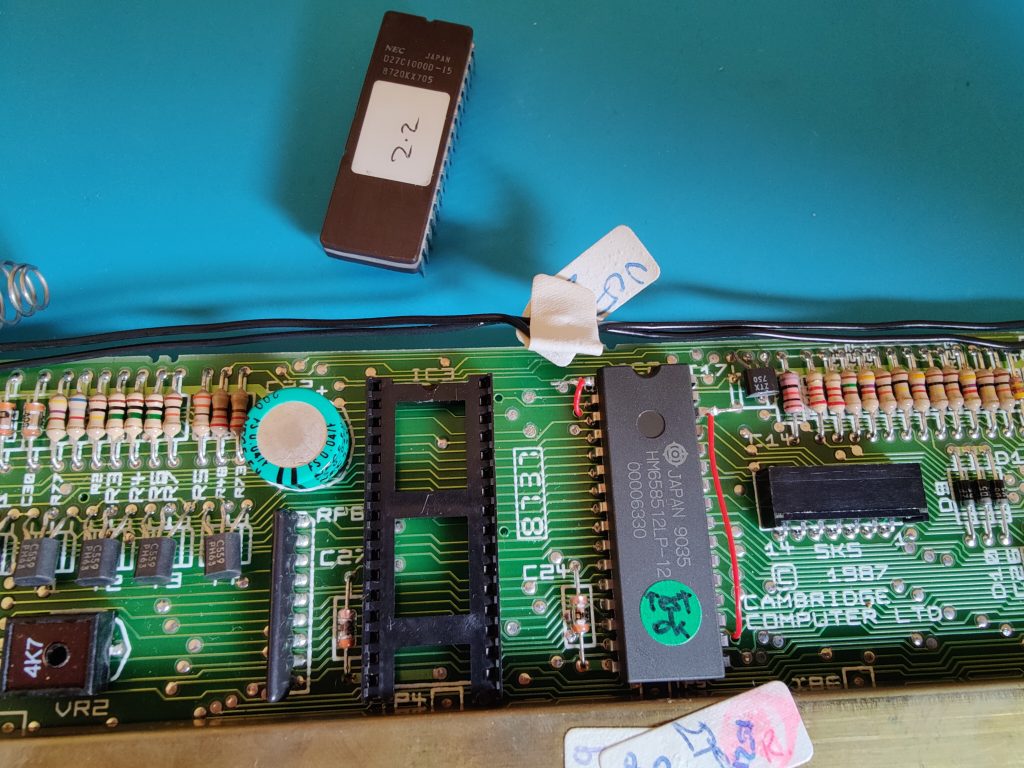
The ROM is already in a socket which makes removal easy, however the RAM is soldered down and interestingly, the footprint for the chip is 32 pin while the stock chip is only 28 pin. I carefully de-soldered the RAM chip using a combination of my soldering iron with solder sucker and my hot air station to melt the last of the stubborn solder left behind while gently pulling to ease the chip free from the board. I also poked the soldering iron in one side and used the solder sucker from the other to clear out the 4 holes at the top of the RAM footprint since the new chip is a 32 pin package.
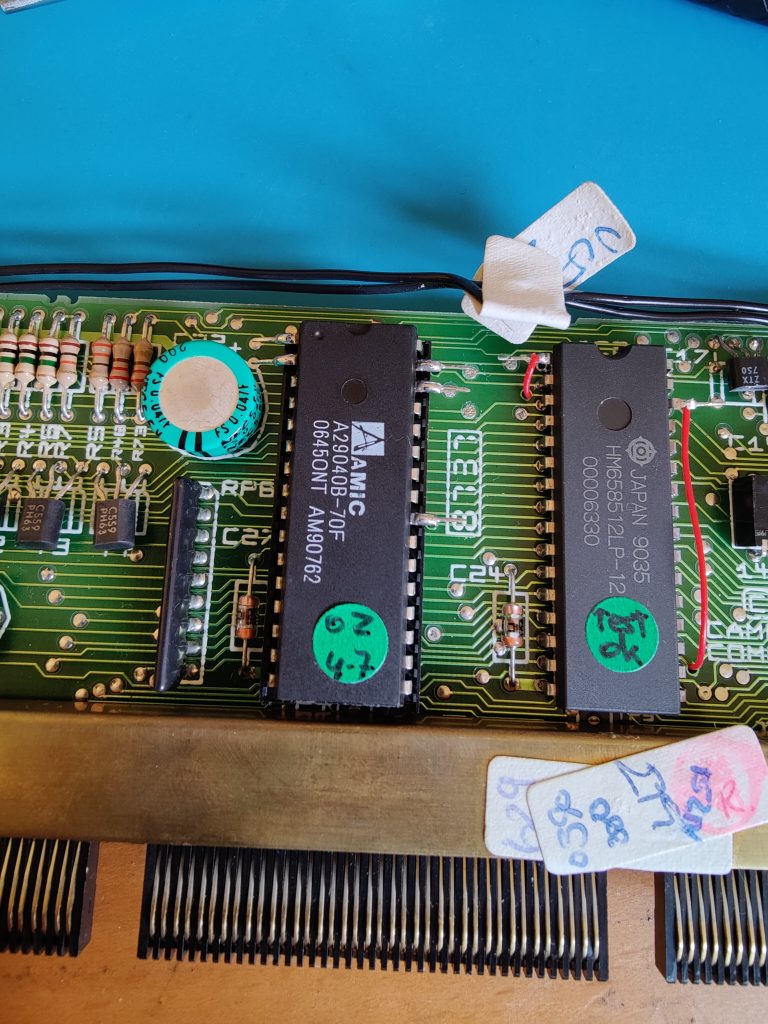
I believe at the time of the Z88’s release, 128K chips that would have used the full 32 pin footprint were available for the RAM, but would have increased the cost of the machine substantially. So to avoid that increase, the cheaper 28 pin 32K chip was used instead. As we are putting in a 512K chip, two pins need to be rewired to additional address lines for the machine to see the full amount, so I lifted pin 1 and pin 30 when soldering the chip down. I chose not to use a socket to avoid any modifications to the casing (due to the increased height) and because I was relatively confident that both my soldering would be ok and that the chip would function.
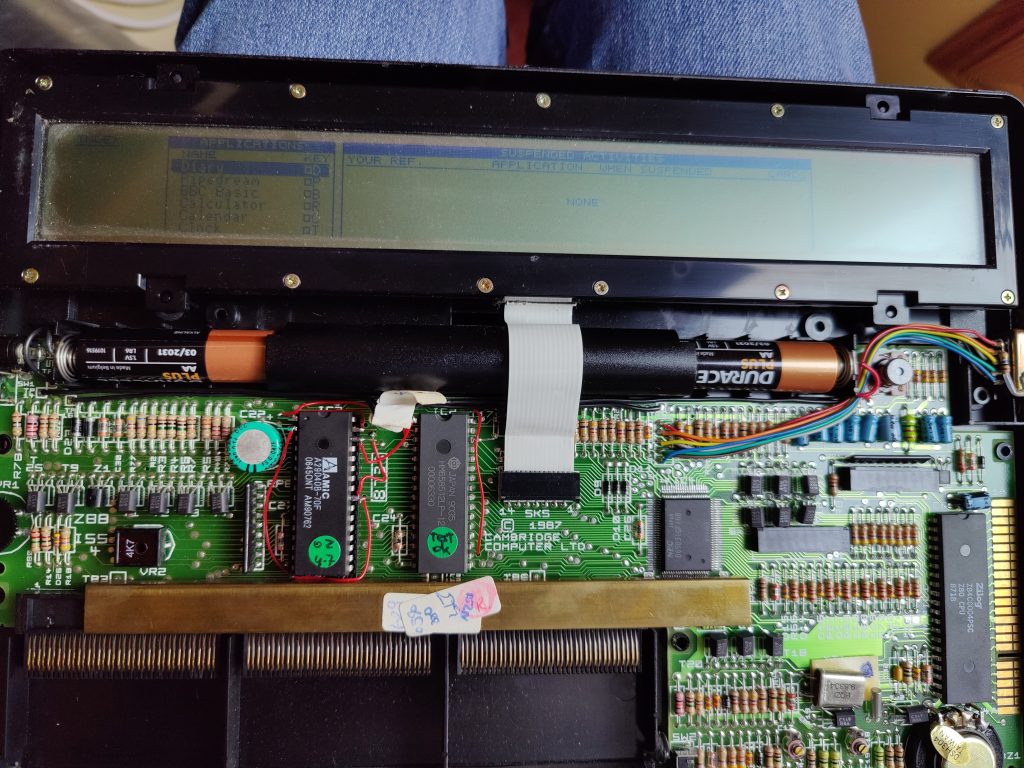
Once the chip was soldered in and I’d connected the additional address lines, I reassembled the machine and gave it a test before proceeding with the ROM upgrade. I wasn’t sure if the original OZ ROM in my machine was capable of checking the size of RAM fitted internally, but given it was the only RAM chip on the board and things seemed to work, I called that a success and pressed on with changing the ROM over to the new 512K flash chip.
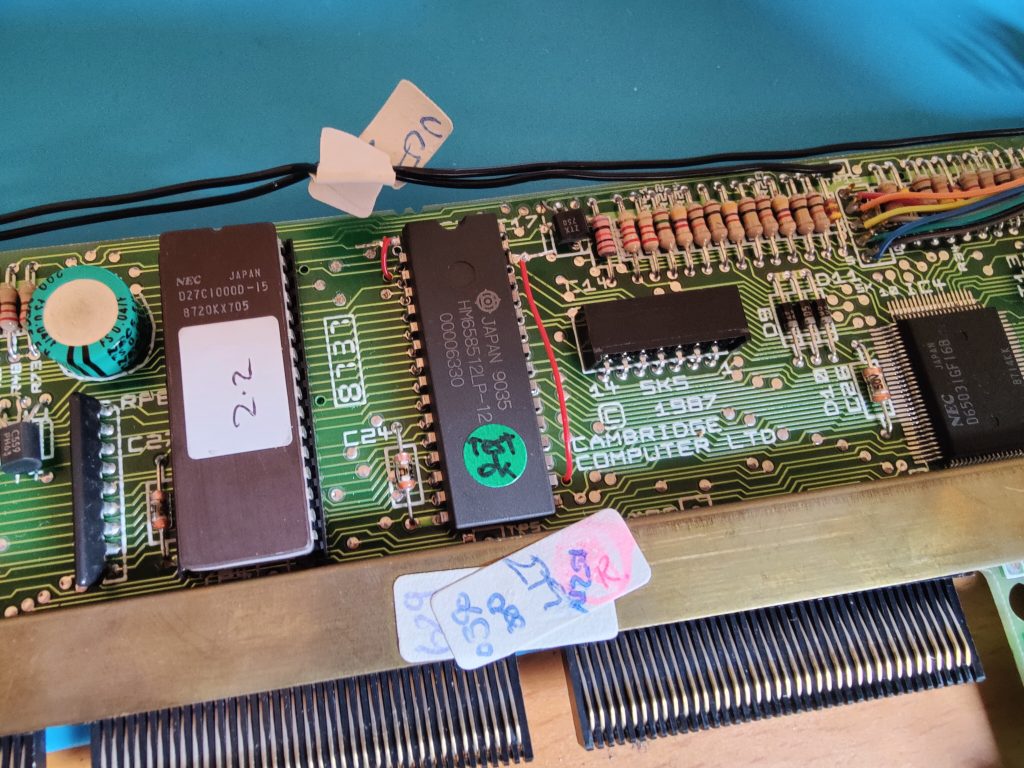
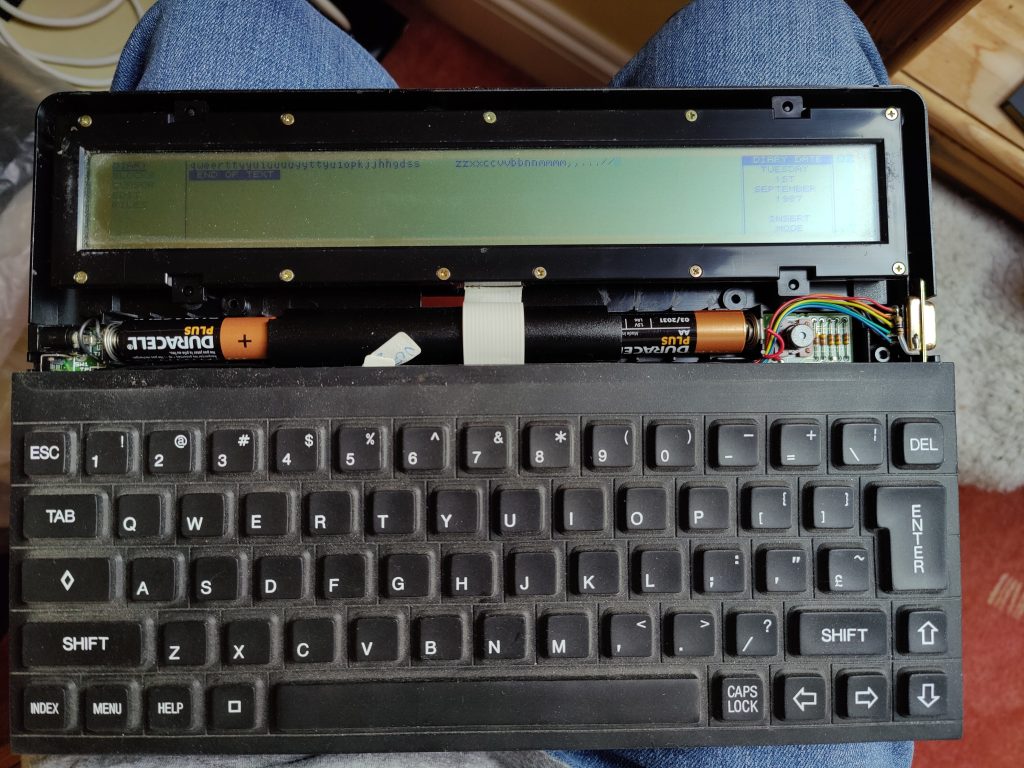
The ROM was freed by prising gently with a flat head screwdriver (I’m guessing the 2.2 written on it meant I had OZ 2.2 fitted in there originally) and the new chip required 5 pins (1, 2, 24, 30 and 31) to be lifted and wired elsewhere. Two would go to the same points as the RAM upgrade required so could easily be linked over to the pins on the RAM chip itself, while the other three would go to various points on the board. I noticed that in the guide, wires were routed under the ROM socket to neaten the installation. Unfortunately my socket was a different kind so I could not do the same, and had to make do with a slightly messier result. I didn’t mind though, as long as the connections were reliable and everything worked ok. Below are some pictures including one of the first test with the new ROM, which I’m pleased to report worked first time!

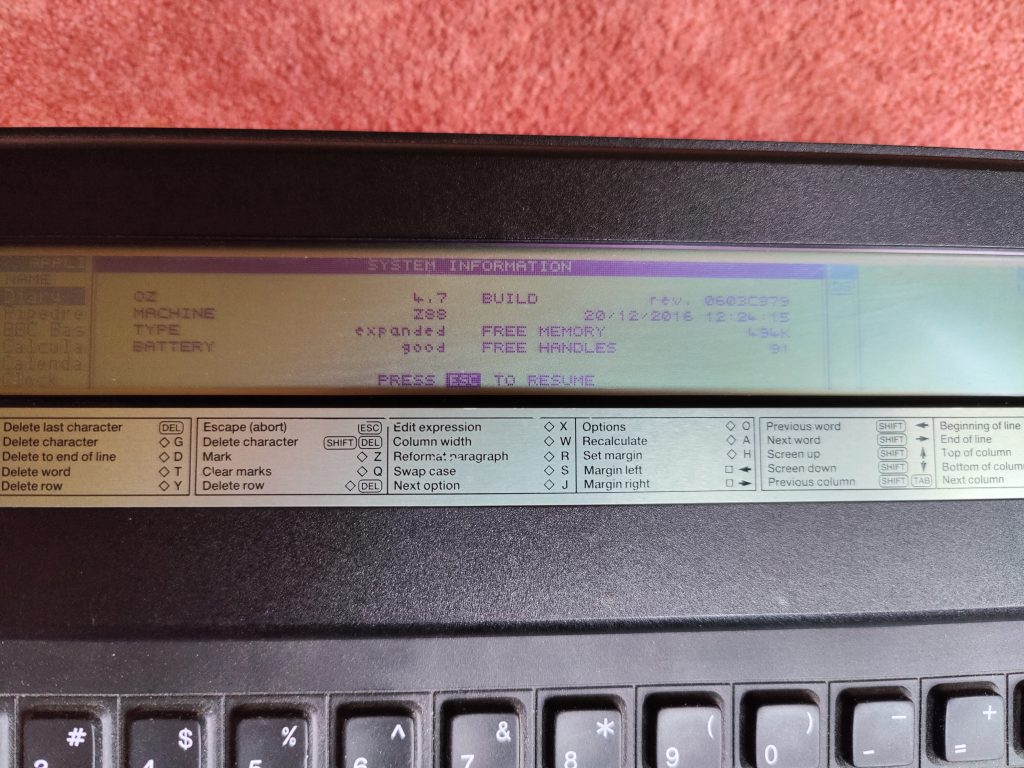
Once I was happy everything seemed ok, I gave everything a clean before reattaching the keyboard and buttoning the machine back up. I acquired a specially wired serial cable and am planning to experiment with loading up some software. I also know that there are newer versions of OZ I could flash to the ROM from the now built in upgrade function. OZ 4.7/4.7.1 are still the stable releases (I believe 4.7.1 supports more flash chip types) but there are builds of OZ 5 available. I’ll likely post again at some point with details of what I’ve had running and whether or not I sprung for the OZ 5 upgrade. One thing I’m particularly interested in is a port of the ZX Spectrum classic, Manic Miner!
For now the machine is happily running OZ 4.7 and reporting the correct amount of internal RAM after the upgrade.
Glad you succeeded in upgrading your Z88 with my set. Be carefull upgrading to 5.0 heard from others they had to reprogram the ROM to 4.7 again to get a stable Z88.